Star Quilt

I’m a real Pinterest fan, and I love getting my inspiration for making quilts from other peoples designs. I See a picture of a finished quilt I really like, and then follow through to the web page of the creator of it. I look to see if there are instructions for making a similar quilt, and then try it our for myself. This is probably the reason why I like to write up my quilt making process, and load up some photos. I hope that someone is helped along their quilting journey, by checking out my posts on pamperstamper, or some other persons blog.

The link below was the quilt I fell in love with, and decided to copy. If you open up the link you will see that there are wonderful and descriptive instructions on how to make this design. I have also taken photos of the journey of creating my quilt. You will see the similarity 🙂

Charming Stars Quilt

1. Pick your colours. Cut out all the squares, and place them in the way that they look their best to you
2. Four of the squares in each block will need the smaller squares sewn into two corners
3. Continue to sew the smaller squares into the same patterned material. Trim to sewn edge and iron flat
4. You will end up with a pile of stitched and unstitched squares that will create your block
5. Join the rows of three squares and iron the seams in the same direction for the top row and bottom row, but the other direction for the middle row. This will help the next lot of stitching line up easier
6. You now have a completed block. Continue to do the same with the rest of the blocks for the whole quilt
7. I used the little squares that were cut off the corners to fill in between each block, and also strips of the same material as the star. In my quilt I chose white
8. Continue to join all the blocks in rows using the white strips. Make a joiner row using just the while strips and little blocks, and then join all the rows together
9. Now you can border, layer, and bind your quilt.
10. I chose to topstitch my quilt by outlining the stars and blocks. I was kind of pleased with how the back of the quilt looked. It had a pattern of it’s own

Can you believe how easy it is to make that wonderful star pattern block with just 9 initial squares of material? Having the centre block, the little squares that are cut to make the points, and the strips the same colour makes the stars stand out. This could be a great quilt for using up lots of scrap material. You could make the quilt using different materials for every block.

Maybe I could make that next time?

Now if I have encouraged you to try making this patterned quilt for yourself, please let me know how you got on. A photo of the finished product would be great. I look forward to your response.

Chevron patterned Quilt

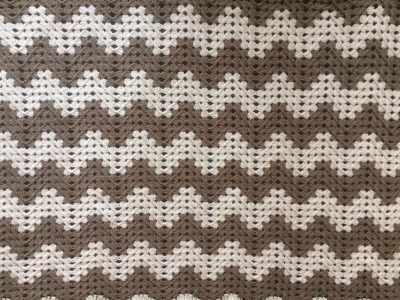
I’ve always loved the Chevron pattern. I have made two crochet blankets in a chevron pattern, and now I have also made a chevron patchwork blanket.

My first chevron crochet blanket.
The chevron pattern looks great!

This blanket was suppose to be for our youngest Grandson. He was born November 2016. I made it in pure New Zealand wool, but it ended up being so heavy. I would have to pay a fortune in postage to get it to London, where he lives. My eldest daughter now uses this blanket at work. On a cold day it is perfect to wrap around her legs and keep her toastie warm.

Great colours for a little baby boy 🙂
This photo shows the colours better

This was my next attempt, and I am really pleased with how it turned out. I made it out of acrylic, which is really great for wash and wear. It was also much lighter and cheaper for postage 🙂

Look how snuggly this blanket turned out! Little grandson is tucked up nice and warm in his Nana made blankie.

Now onto sewing Chevron. It is actually a whole lot easier than it looks. In fact with patchwork, there are often little secrets to the sewing that make the whole process a lot easier than you think. Thank goodness for that, because, by nature I am a rather impatient person, and to have shortcuts really suits my personality.

Here is the process I used to create my quilt.

Start off with two piles of square cut materials. One pile is plain fabric. I used calico. The other pile has a number of each colour. The amount depends on how big you want to make your quilt
Place the two squares together, good sides facing each other, and sew a quarter inch seam right around the outside joining the two pieces of material together
Using a cutting mat and quilting ruler, cut diagonally in both directions
You will end up with 4 new squares from each of the original squares. These ones have a join in the middle and have two different materials
Once all the squares are cut and pressed, lay them all out to work out the pattern and colour scheme you want
Sew each row together and iron the seams one way on one row, and in the opposite direction on the next row.
I keep the rows in order as I sew, so it is easier for ironing and joining
Now you sew the rows together. As you sew them together, you will notice that they fit together nicely when the seams are ironed opposite.
once the mail chevron pattern is sewn together, you can pick how you would like to border the quilt. Put the layers together and do your top stitching
I’m lucky to have a lovely big craft room with two big tables that I can spread my quilts out on. This makes putting the layers together a little easier. I love the curved safety pins that I can use to temporarily hold all three layers together while I do my topstitching.
I do all the topstitching with my cheap brother sewing machine. It has served me well, I can tell you. I roll up the quilt, and slowly feed it through as I sew. This is a process that requires lots of perserverance and patience. I do my own topstitching as I am too scroogey to pay for it to be done professionally. I’m quite happy with the finished effect.
The finished product

To finish my quilt, I did multiple rows of stitching on the outside border. I then sewed the binding on and it was complete. I love it and it has become my quilt that is used the most. I can just throw it in the washer and it comes out great. A very practical quilt that is pretty to look at as well 🙂

I hope you can follow my instructions and create your own Chevron Quilt. You can finish it off to your own liking. Please post a photo of yours in the comments below. I would love to see what you create.

Easy Zips and Binding a Cushion.

I have been sewing for years, having learnt most of my techniques from my sewing teacher at high school. That was approximately 46 years ago! Over time I have been able to sew most things, so my teacher did a pretty good job of teaching me. Having a seamstress as a sister was also pretty helpful, and she was great for giving advise or help when needed.

About 6 months ago, I decided to recover the squabs in our caravan, and looked to ‘You tube’ for instruction. I  wanted to make box shaped squab covers. I had the idea of how to make them, but watching a video of someone else sewing these covers, helped to confirm the technique. It was while I was watching them, that I saw of a new process to me, of putting zips in. And I used that process on the squab covers. It was so much easier and quicker than my old way.

Here is the process.

I am making a cushion cover and this is a fat quarter that I am using for the back of the cushion. It needs an opening for the soft pillow insert. The best way for that opening, is to put in a zip that is just under the size of the width of the cushion. I have folded over the top of the fat quarter and sewn a seam about a half inch in. This seam is sewn in the biggest stitch possible, as it will be taken out at a later date. A big stitch length is easier to unpick!

Cut open the fold

Overlock the seam edges, and press open the seam.

Now place the zip on top of the seam, making sure that the zip opening is right on top of the sewing stitches.

Sew the zip in with the zipper foot on your sewing machine. It is a little tricky around the zip pull. I stop sewing, adjust the zipper pull, and then restart sewing again.

You can see by the photo above, that I have stopped sewing about 2 inches from the edge. This is so I can undo the seam a little to allow the zip pull to move away from the sewing machine zipper foot. Now just finish sewing the zip in.

This is what it looks like on the good side of your cushion cover

Carefully use your seam ripper to undo the first seam that you made

And you now have a zip in the back portion of your cushion cover. How easy was that?

I had already made the front of the cushion cover.

As I like to bind the edge of the cushion, all I have to do is place both pieces together and overlock the edges. This helps to keep it all neat and tidy while you commence the binding.

The two pieces are held together by the overlocked edges. Note both good sides are facing out.

For the binding, I cut strips of material at 2 and a 1/2 inches wide. Place the corners at 90 degrees, good sides facing each other, and stitch diagonally across both pieces

iron the seam open

and cut the edge off to leave about a quarter inch

Press the seam open again, nice and flat 🙂

Make sure that you have enough binding to go right around the edge of your cushion. You need to leave an nice long tail as you start sewing. When you have gone around, stop about 8 inches from the start point. You will need to lay the long tail from the start on top of the binding left over at the finish. The overlap needs to be the same size as the width you cut the binding. Mine is 2 and a 1/2 inches. Cut the two and a 1/2 inch overlap and discard the rest of the binding. You can join the two together , and you will have the exact amount left to finish off binding the whole cushion.

When you get to a corner, you will need to sew up to a quarter inch before the edge. Turn the material, and sew off the corner. Fold the binding back on itself and then down the direction of the next side. You can then put the pressure foot down, and keep sewing. This will make a perfect corner when you turn the binding over to the back.

Fold the binding around to the back and stitch into the ditch on the good side. This will catch the binding on the back and sew it all down nicely. You will need to fold and turn the corners to match with the front.

Undo the zip and insert your soft pillow insert and zip up again. You now have a completed cushion to admire and cuddle up to 🙂

The challenge is for you to make one as well (or more). Follow my instructions and make a few scatter cushions for your home, or as gifts for friends and family. Please send me a photo of your creation in the comment section below 🙂

The Disappearing Nine Patch

I can’t believe it! I have made another blanket! I’m really on a roll at the moment, and thoroughly enjoying myself.

This time I used the disappearing nine patch block for the main part of the quilt and then added a border and binding. The material is a Riley Blake fabric and is very pretty and bright. I’m not actually sure if I will give the blanket away or keep it for myself to enjoy. I have never made one for myself as I usually have a person in mind, or a reason for making the blanket before I start.

Here are the instructions…

I chose nine different fabrics with the 'busy' fabrics placed in each corner. These are the squares that remain whole and I wanted the pattern to be complete. I wished I had replaced the left middle fabric with one that was more of a plain fabric, but as it matched perfectly, I thought it would be okay :-)
I chose nine different fabrics with the ‘busy’ fabrics placed in each corner. These are the squares that remain whole and I wanted the pattern to be complete. I wished I had replaced the left middle fabric with one that was more of a plain fabric, but as it matched perfectly, I thought it would be okay 🙂
Firstly sew the rows and press the seams in opposite directions. This helps them fit together nicely and the sewn lines to join up when you sew the rows together.
The nine squares have now been sewn together and pressed. Can you see how the seams fit together nicely. That is the aim, so when you top stitch at the end, the lines are straight :-)
The nine squares have now been sewn together and pressed. Can you see how the seams fit together nicely. That is the aim, so when you top stitch at the end, the lines are straight 🙂
This is the exciting stage. The nine squares are now cut directly in the middle in both directions as shown.
The cut 'new' squares can now be placed together again. You can put them in any direction as you like. Try them all out to see what you like best before you start to sew them together again.
The cut ‘new’ squares can now be placed together again. You can put them in any direction as you like. Try them all out to see what you like best before you start to sew them together again.
I chose to have the two little yellow squares opposite each other in the middle and the other two at the far corners.
I have placed all the fabric pieces together to get an idea of the finished pattern. I liked this layout so next stage is to sew them together. I sew each row, and then join the rows up. Making sure to press the seams after sewing. The rows have the seams ironed laying opposite directions. This is to help the joins to fit together nicely when you sew the rows together
I have placed all the fabric pieces together to get an idea of the finished pattern. I liked this layout so next stage is to sew them together. I sew each row, and then join the rows up. Making sure to press the seams after sewing. The rows have the seams ironed laying opposite directions. This is to help the joins to fit together nicely when you sew the rows together (as I did with the first nine squares)
All sewn together and pressed. I'm loving these bright colours!
All sewn together and pressed. I’m loving these bright colours!
A bigger photo so you can see the overall pattern.
A bigger photo so you can see the overall pattern. Here is where I realised that the red pattern square, that I chose to be cut up, was still a bit too bold. It has blended into the main red square too much and made them both a little too busy. Never mind. I won’t do that again!
I decided to make my border the same width as the squares that I started with in the beginning.
I have fast tracked the project. If you want to see how to put the wadding and backing material onto the patchwork, you can look at my previous blog post. I did do one thing different this time though... As it was a larger blanket, I used fabric spray on glue to help hold the materials together. It washes out and causes no long term damage to the blanket, but it certainly makes life a whole lot easier when it comes to the top stitching :-)
I have fast tracked the project. If you want to see how to put the wadding and backing material onto the patchwork piece, you can look at my previous blog post. I did do one thing different this time though. As it was a larger blanket, I used fabric spray on glue to help hold the materials together. It washes out and causes no long term damage to the blanket, but it certainly makes life a whole lot easier when it comes to the top stitching 🙂
And here is the finished blanket with a cute little narrow yellow binding. This blanket is a 1 and 3/4 meter square one. Plenty big enough to cuddle under :-)
And here is the finished blanket with a cute little narrow yellow binding. I used the ‘Stitch in the ditch’ method of top stitching. This is when you sew right on top of the seam. The stitch line just disappears down into the stitched seam, but makes the blanket hold together firmly. On the back the stitching looks like a big graph and is neat and tidy! This blanket is a 1 and 3/4 meter square one. Plenty big enough to cuddle under 🙂
And with the little pieces of fabric that I had left over I made a pillow to match! I'm rather proud of how they both turned out. The pillow was just little strips sewn together and the red used as a filler to make them square :-)
And with the little pieces of fabric that I had left over I made a pillow to match! I’m rather proud of how they both turned out. The pillow was just little strips sewn together and the red used as a filler to make them square 🙂
The fabric that was left over from the two blankets I wrote about in my previous blog post, made two lovely pillows. The one on the left I used the same process as the blankets, but the one on the right is another design which I will demonstrate in another blog post. It is really easy and looks great!

Now you can try out the disappearing nine patch block on your own blanket. I suggest you make a little babies blanket first so you can practice before commencing a larger one. It really isn’t hard and looks great when finished. It’s one of the first block patterns that I tried, and I have been really happy with the finished blankets. If you look up patchwork in the categories, you can see my previous quilts and blankets. See if you can find the other disappearing nine patch ones 🙂


The Creative Juices Are Flowing

There is nothing like a baby being born to get me in the mood to create!

Over the years I have made hundreds (a slight exaggeration) of bibs, cuddle blankets, leggings, little tops, cardigans and bootees. And, if you search through my past blog entries you will see that for my youngest three grandchildren, I made each of them a crochet blanket, and I also made them patchwork ones.

Robins niece had her second little baby girl on the 18th of April. It’s nearly a month later, and today I finally popped in to meet little Fable and give her our gift! I spent all day yesterday finishing the blanket off, and it turned out great! (even if I must say so myself) I was so happy with the finished blanket that I thought I would share the process with you, my reader. There are often little tricks with Patchwork that make something that looks very complicated, actually quite easy to put together. Of course the material choices make quite a difference to the finished product as well, and that is often trial and error. Luckily the combination of fabrics looked great this time.

Awhile ago Spotlight had a sale on and I purchased 8 different materials that would blend together, and about a quarter of a metre of each one. I then purchased two different plain fabrics that matched one of the colours in the fabric pieces. I got approximately a metre and a half or two metres of this solid colour fabric.

So here are the instructions…

Firstly I cut the 8 different materials into 3 inch strips (each is the full width of the material). I then match two groups of four strips. Here are the blue/green strips.
Keep the colours in order I sew them together with a quarter inch seam.
Keeping the colours in order, I sew them together with a quarter inch seam.
The last of the pink/yellow selection sewn together.
And you end up with two long strips, each of four different materials. Please note these have been pressed neatly. I have my iron out and going the whole time I sew, and press the materials frequently.
Now to measure and cut. Even up the ends of the strips first.
You need to cut the material up as wide as it is high, right along the long strip. I got four big squares off each one.
Here are the two groups of four squares.
Keeping the patterns in order line them up beside each other with one colour group having its stripes going at a 90 degree angle.
Put the two different ones together with the right sides facing each other and sew a quarter inch seam right around the outside of the square.
Sew neatly around the outside edge :-)
Sew neatly around the outside edge 🙂
From corner to corner cut with your rotary blade, then spin around and cut the opposite diagonal.
You should end up with your large square cut into four like this!
Press the seams and turn over. Voila! Look at that! Aren't they so pretty! These four have been placed making a little mixed square in the centre.
Press the seams and turn over. Voila! Look at that! Aren’t they so pretty! These four have been placed making a little mixed square in the centre.
Or you could place them with the little triangles to the outer corner. Or you could mix them up totally. The last way is extremely hard to keep control of when sewing together. I get lost! So I kind of like to still have some order (among the chaos).
Once all four big squares have been cut up, place them together again in the way that you want to sew them up.
Sew up each row making sure to press the seams once finished.
Then sew the four rows together. Don't they look pretty :-)
Then sew the four rows together. Don’t they look pretty 🙂
On this blanket I chose the green with little pink flowers for the first border. Sew on the top and bottom first and then the edges. Make sure to slightly stretch the material as you sew. This makes it easier for the quilt to keep shape, and for the top stitching later on.
On this blanket I chose the green with little pink flowers for the first border. Sew on the top and bottom first and then the edges. Make sure to slightly stretch the border material as you sew. This makes it easier for the quilt to keep shape, and for the top stitching later on.
My next border was a very cute yellow tree pattern sewn exactly the same way as the green border.
Because this is a smallish quilt (or blanket) there is no need to top stitch through all layers. On this one I have added the wadding to the back, and if you look closely, I have top stitched through both of the layers. This keeps the blanket looking neat and holding together well after many washes. There are many ways that you can top stitch on a quilt. I have just made quarter inch lines alongside the seams and it looks very tidy.
Because this is a smallish quilt (or blanket) there is no need to top stitch through all layers. On this one I have added the wadding to the back, and if you look closely, I have top stitched through both of the layers. This keeps the blanket looking neat and holding together well after many washes. There are many ways that you can top stitch on a quilt. I have just made quarter inch lines along each side of the seams and it looks very tidy.
Now I have added the backing and finished the outer rows of top stitch through all the three layers.
The next stage is the binding. I cut three inch strips and joined them together to make one big long strip. Fold it in half and iron the fold.
With the cut edges together sew the binding on stopping about a quarter of an inch from the corner and sew diagonally off the edge.
Turn the cloth around and fold the binding to have a straight edge along the top, then just recommence sewing the seam.
Iron the binding out from the edge and fold it around to the back. At the corners fold the binding in the same way as you did when you were sewing and they will just fit together nicely. I then stitch in the ditch on the front of the blanket, and it catches the back and sews the binding down neatly. you can hand stitch this part if you want the stitching to be completely hidden.
And here are the two quilts that I made in two days. I must admit that each one took all day, but they were wet days and not a lot else could be achieved, except housework! And that is always there anyway!
And here are the two quilts that I made in two days. I must admit that each one took all day, but they were wet days and not a lot else could be achieved, except housework! And that is always there to do anyway!
All folded up ready to be given to two very special little babies. Fable got the green edged one, and Zoe got the pink edged one.

Now I find that there is no greater pleasure than to give a gift that you have hand crafted. I pour my love into the blanket as I sew it up and I imagine the little baby that I am making it for, laying on it, kicking their little feet happily. I pray a little blessing on the child and hope that the Mummy enjoys seeing her child playing on the pretty blanket.

I also get a great sense of satisfaction seeing how the colours and patterns fit together. These two blankets had the inside panels the same and yet the outside borders were completely different creating a unique blanket for each child.

I hope that the instructions are clear enough and you can now be bold enough to attempt your very own patchwork quilt or blanket. Let me know how it goes! Send me a photo of your one finished so I can enjoy the colours and patterns that  you have created.

ENJOY 🙂

A little bit of my crafty life…

While expecting the three new grandchildren to arrive this year, I decided to get back into some of my older craft activities. Amazingly, the Scrapbooking has been put aside until I’ve completed these baby gifts! But I will get back to it as there will be so many photos of each new grandchild to make pages with… I can’t wait!

I’ve now been sewing baby clothes, wraps and bibs and also had the knitting needles and crochet hooks out….and I’ve had fun! Nothing like a new baby to give you motivation.

So first to be born this year was G5 on the 4th of February. I made her a crotcheted blanket just like the one I had for my children when they were babies.

083
G5’s Blanket. I had to feature some pink!

And here is beautiful little G5 tucked up and sound asleep with her new blanket. Hopefully she will be able to keep her own ‘Nana made’ blanket for years 🙂

Doesn't she look so peaceful
Doesn’t she look so peaceful

While I was making G5’s blanket I had another pink one on the go. With having two grand daughters arriving I needed/wanted to make one for each of them. The other blanket was quite different. Instead of crocheting in rounds I crocheted in rows of treble crochets.

Now...this is a much brighter pink!
Now…this is a much brighter pink!

I had fun making this blanket as it was in 12 ply and grew very fast. Trouble was it used heaps of wool up too and I ran out doing the edge! As it was such a bright blanket I decided to tone it down with a fancy white edging. This blanket is now in England waiting for grand baby girl to be born. And….I can’t wait to hear the news as it could be any day now 🙂

In the end I loved the white edging. It brings such a contrast and is quite lacy

Here is a close up of the lovely white lacy edge…

I think it is really pretty. I just hope her little fingers don't get caught in it all the time.
I think it is really pretty. I just hope her little fingers don’t get caught in it all the time.

So G5 was born in February and on the 10th of March I headed for Sydney to be there when Grandson G6 was born. I took a suitcase of wool with me to crotchet G6’s blanket with. I had 20 days! He arrived on the 18th of March, one day before his due date.

Waiting for Luke's day of birth. I'm crocheting and Rebecca is journalling
Waiting for G6’s day of birth. I’m crocheting and D1 is journalling

I started a pattern of so many rows of the blue/green wool and then two rows of white. The blanket ended up huge, as I had to complete the pattern…and I ended up having to race to ‘Spotlight’ to buy more wool. But in the end I was really happy with it…and I got it finished

It was big enough to cover the sofa!
It was big enough to cover the sofa! And this isn’t the finished size! I still had more rows of colour to do and also the white edge!

And because I had brought more wool I decided to use it all up and make a pillow to match…although the pattern was different as I had more white wool left than the coloured wood.

I managed to make both of these in 20 days...so happy :-)
The finished blanket and pillow! I managed to make both of these in 20 days…so happy 🙂

I have a photo of G6 laying on his blanket in the previous post. Go and have a look at him…he is such a little cutie!

I enjoyed crocheting so much I have started another blanket. It’s so easy to just sit and crotchet while you are watching TV, or a movie, or even while you are talking. I feel like I’m being productive even while doing nothing.

Now isn't that cute :-)
Now isn’t that cute 🙂

I should really be using a bigger size crochet hook but I didn’t have mine with me when I started and I didn’t want to undo it and start again….so it is very tight crocheting and quite firm! I hope it’s going to be okay when it’s finished.

Now, when I was in Sydney I also finished off knitting a little blue cardy. I started it when D1 first found out she was pregnant….so it has definitely been a work in progress! Apart from sewing the buttons on, which I left for D1 to do (I didn’t have any and didn’t have time to shop for some), I got it finished! Phew!

Minus the buttons and a little bit of sewing up :-)
Minus the buttons and a little bit of sewing up 🙂

So along with the knitting and crocheting, I have also been making myself a couple of dresses and some baby items as well. I forgot to take photos of the baby things apart from these two little dresses…

One for Ella and one for Sophie :-)
One for G5 and one for G7 🙂

I usually find it hard to make clothes for myself that fit okay once sewn up. I’m not very good at altering the pattern for my body shape! I usually sew it up as much as possible and then put it on inside out and pin the seams to fit better! I decided to buy a new pattern as see how it turned out by just cutting and sewing as the pattern said! This is the pattern…

This pattern is really easy to use! I was really happy with it :-)
This pattern is really easy to use! I was really happy with it 🙂

I purchased my material from ‘Spotlight’s’ 30% off sale. For one dress it cost $12! Now that’s a bargain. especially if you don’t count the value of my time taken to make the dress. I made it for me for free 🙂

This is the first one I made. Excuse the fact that my body has got wider through the middle as I have got older. I need to exercise more but I am too busy sitting down doing craft!

This dress has pockets at both sides. It has been cut and sewn just as the pattern said and fits me perfectly. You have no idea how happy this makes me feel. So happy that I had to make another dress!

This one I decided to make a contrast top on it like in the pattern :-)
This one I decided to make a contrast top on it like in the pattern 🙂

I just have one more dress cut out to sew up for me, and the crochet blanket to finish, and then I can spend some time creating with these beautiful fat quarter fabrics. They have been washed and are just sitting waiting for me to find some inspiration and spare time! Aren’t they fabulous!

Now what am I going to make????

I will be spending a wee bit of time on ‘Pinterest’ looking for ideas I think 🙂

A Patchwork of a year

You all know that I am a pretty crafty person. In fact I feel something missing in my day if I haven’t managed to be creative in some way. From my previous blog post you can see that patchwork has been a favourite hobby over this past year. In fact, scrapbooking has been put aside while my sewing machine has been a priority…and that is quite a miracle! So today I decided to share a few photos of my creations.

20130522-093357.jpg
A duvet cover with a duvet inside for C3’s baby girl 🙂
A Blanket I made for D3’s Birthday. Yet to be edged in this photo.
20131229-094725.jpg
Blanket/playmat for C1 and D1’s baby boy
20131229-094801.jpg
Duvet cover with a duvet inside for C1 and D1’s baby boy
20131229-094858.jpg
Blanket for C5 for Christmas 2013
20131229-095039.jpg
A Playmat for C2 and D2’s baby girl. I hadn’t edged it in this photo, but it was edged before I sent it off to London 🙂
20131229-095137.jpg
Made as a picnic blanket for Rebecca and Roland’s engagement present. I wrapped it up along with a salad bowl and serving spoons for their future picnics 🙂
20131229-095209.jpg
A Blanket I made for Mum for Christmas. I also made a pillow to go with it 🙂

Now my creations are actually very simple constructions. After making these I now have the utmost admiration for real quilters. You know what I mean I am sure. The people who create masterpieces! How I would love to have the patience to fiddle around with tiny scraps if material and sew them in planned order to create a quilt that would be treasured for generations. Wouldn’t that be marvelous!

We leave behind us children and grand children and then the generations of family that follow, but to have one of your creations handed down over those generations would be something special. Maybe that could be my challenge for 2014. To make a very special quilt. Stitched with hours of love and ending up looking wonderful. Something like this one that I like from ‘Instagram’

20131229-104355.jpg
I think this quilt pattern is lovely, but imagine all the sewing involved and all the seams to iron flat!!


But who would I make it for? I could sew it with love for each and every one of my family! But which person would treasure it forever and appreciate my time and love and energy that I will put into making it?

I guess my focus should really be in the joy of creating something and blessing someone with that creation, and not be too concerned with what happens with it over the years.

Now all I need is spare time and an awful lot of patience!

And the fruit of the Spirit is….

Love, Joy, Peace, Patience, Kindness, Goodness, Faithfulness, Gentleness and Self Control!!!

All great character traits to have/aim for! I thank God that He is in the process of growing all of these great qualities in us. Can you imagine how life would be if we were loving, kind and having self control, etc, etc, all the time? But to be honest we have some that we are great at and some that we find hard….like patience for example. One of my BIG failings or the lack of it anyway! And here I am doing patchwork! Of all the hobbies/crafts why did I have to pick patchworking? The process is long, laborious and very repetitive. Just picking the right fabric and colours are challenging enough. There is an awful lot of work to do before you can see that the colours and patterns are great together, and one wrong decision can create a quilt that you are forever unhappy with. There is NO way you would unpick a whole quilt…well I certainly wouldn’t!

But I am having fun! I started with making some pillows about two and a half years ago (check out my blog post from May the 13th, 2011) and from there the addiction has grown. I love it! It is so satisfying to see the finished project.

When I first get the materials together I spend ages looking at the beautiful pieces of fabric. They are always fabulous (I choose ones that I love). They are almost too pretty to cut up! But to convert the little pieces of fabric into a larger masterpiece, they have to be cut up and then pieced together again. And, there are many many different ways to put the fabrics together. I find ‘You Tube’ amazing, especially ‘The Missouri Quilt Company’. Just do a search on ‘You Tube’ for them and you will get heaps of ideas. They also show you little tricks of how to put the pieces together easily and yet create very tricky looking patterns.

Now when I start, I wash my materials, dry and then iron them. Next step is to pick a ‘thing’ you want to create. Maybe it’s a quilt (large or small), or it could be a baby blanket, pillow cover, table centrepiece…or anything really! But before you cut you need to know what design you are going to make…then cut the pieces in a way to create the pattern when all sewn together.

I am lucky, I have two big tables that I have put together in my craft room. I can spread out my material pieces over the tables in the places where I want them to be, once they are stitched together. This way I can get a glimpse of what the final design will roughly look like. I can see the colour mixes and work out what looks best together. It still isn’t exactly what the finished design will be but it does give you an idea. Naturally it is larger than what it will end up like though, as all the stitching seam widths have to be taken off the size. But this stage is fun and gives me the added push to get sewing.

The patchwork quilt is made up of a lot of smaller patch designs sewn together and then the larger sewn pieces put together. Understand? A bit hard to describe, but hopefully some photos will help.

20131215-084113.jpg
The beautiful fabrics I started with 🙂
20131214-233011.jpg
Laying out the pieces in groups of nine which will be sewn together. I put the plainest piece in the middle.
20131214-233037.jpg
Each group of nine squares was then cut across the middle vertically and horizontally. This left the middle square cut into quarters.
20131214-233108.jpg
The cut up pieces were then placed together in a random pattern where no seem joins matched and then sewn together.
20131214-233134.jpg
Now the backing material and the wadding is pinned to the front piece ready to top stitch.
20131214-233208.jpg
The last thing to do before putting the edging on is to top stitch the front either by neat stitching lines, stitching in the ditch or as I have done on this patchwork blanket, a process called stippling, where you stitch patterns all over making sure you don’t cross over the stitch lines 🙂

Now, can you see how those little fabric pieces in the top photo can create a beautiful blanket when stitched together like in the bottom photo. The process may be slow and test my patience, but it really is worth it 🙂

A Patchwork Present!

My holiday is planned for the whole of August and my daughter-in-laws birthday is in August while I am away. D3 is a beautiful talented lady and I wanted to give her something special for her birthday. As both her and C4 live in Sydney, I usually give her a gift card or get something delivered from an online store in Australia. Last year I gave her a years subscription to the Donna Hay magazine. But this year my youngest daughter planned a trip over to Sydney and it was at a time when she could take a package for D3 over with her.

I had three days to create something! Robin said he would be okay to help around home while I concentrated on sewing! Below is a series of photos of the progress and the final product. And….she loved it….yay 🙂

Six
Six
Five
Five
Four
Four
Three
Three
Two
Two
One
One


Very Lazy Morning!

So here it is 9am and I am still in bed! I could blame it on the fact that it is a cold morning, I have a cough, and I have had about 4 nights of broken sleep because of that cough (mainly a tickly throat) but really I am just being lazy! Not normally one of my character traits but today it is the main one! And…I actually have a lot to do!

Yesterday I spent the day sewing. It was a cold, wet and thundery day so a good day to sew. I was determined to finish the quilts that I had started, and I did!

Today I start my new job. Yes…I have a new job. What an amazing answer to prayer! I had a phone call from a friend wondering if I would like some work. Like!!!! I would love it! So I am now a receptionist at Phoenix Emergency Doctors on Vivian Street, New Plymouth. I don’t officially start until the middle of June, but this afternoon I am going to learn what I will be expected to do. I am feeling really happy and can’t wait to use my skills again. Don’t get me wrong, I love being at home, but I kinda feel like I aren’t using my brain to the same extent…and I don’t want to lose the ability to work intellectually. I hope that makes sense! I want to be stretched mentally!

So today I have new job orientation, tomorrow I have friends coming over for the afternoon, Friday Joanna graduates so it is celebration time, and Saturday we travel to Palmerston North for Christians 4th Birthday.

Better get out of bed and start moving!

20130522-093357.jpg

20130522-093407.jpg

20130522-093417.jpg